Tuesday 12 April 2016

Easy every day make-up!!


Well hello there and welcome back to my page!! Before we start I just want to say sorry for being MIA for over a month, I've just been really busy planning and organising things and it looks like everything is coming together so I have more time to blog.. Probably not as much time as I would usually have because its graded unit time but I will definitely make sure I set some time aside to blog. So as you can see today's look is just going to be a quick and easy make-up routine, so lets get started!!!

So jumping in I began with priming my face and applying lip balm to my lips. Moving onto foundation I just used my usual L'Oreal true match in the shade "ivory" I applied this using a flat foundation brush and then just to be sure everything was blended out properly I used a damp beauty blender.


For contouring I used the BarryM chisel cheeks contour palette. This is a powder contour and its super easy to use and its really good for beginners. The picture isn't that clear so what I did was I applied some of the powder onto my temples, my cheekbones and my jawline. To carve out the contour I used a rose gold contouring brush from Revolution. For highlight I used "Golden Lights" by revolution and for blush I used "Live Pink" from Rimmel.


Now for the eyes!! I am so in love with this eye shadow palette from Revolution, the colours are fantastic and all the palettes are very inexpensive. You can pick these up in your local superdrug!! Please have a look at the Revolution counter on your next superdrug visit!!
 
 
I keep meaning to start a youtube channel because sometimes I feel it would be so much easier to explain how i'm doing things but I just never get round to it plus don't you have to be fantastic and video editing? That is not a talent I have. So anyway i'm going to explain this the best I can!! First things first I took the colour at the vey bottom and applied that all over my crease, then picking up the nice pink blush colour in the middle and applied that to my lower lid, then picking up a small blending brush I made sure there was no harsh lines. On the inner corners of my eye I just packed on the lightest colour you can see at the top.


 Finally I just applied some liquid eye liner and mascara, remember you don't need to draw the wing if you don't want to, you don't even need to apply eyeliner at all if you don't want to. Also please feel free to add on some false lashes if you wish!! For brows I just did a natural fill in using the Rimmel "brow this way" gel and powder, you can use whatever you want to fill in your brows though.


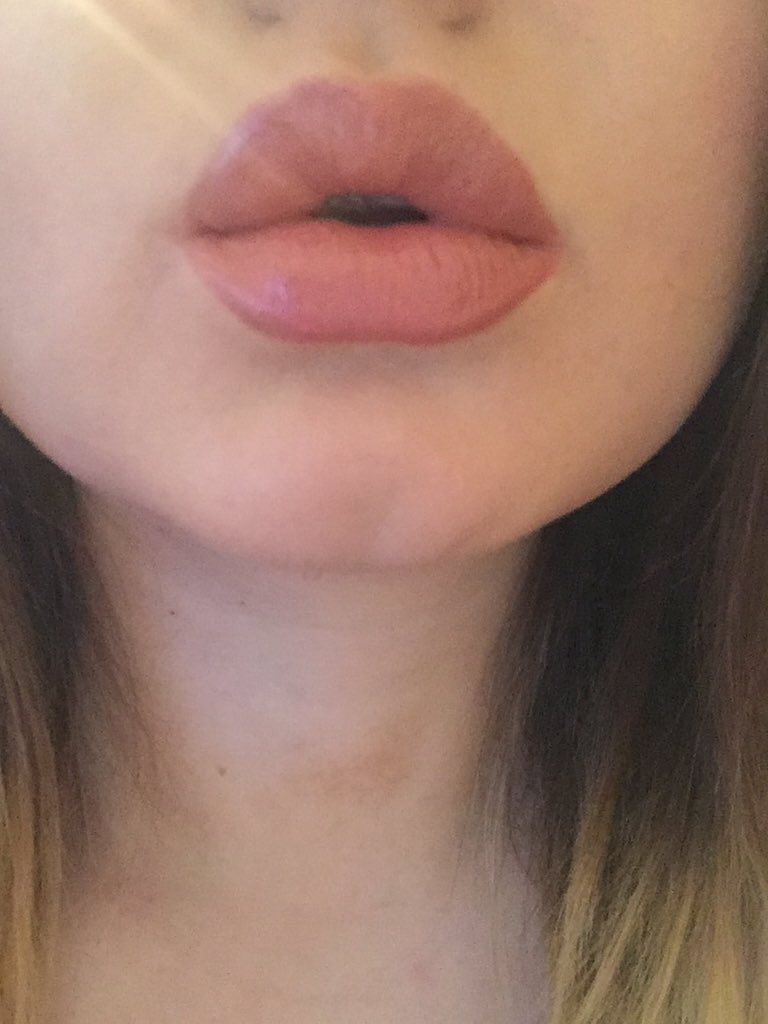
At the beginning I had already prepped my lips so they were feeling nice and nourished. So for lip liner I used "Whirl" by mac. For lipstick I used this new sort of sponge pen thing from L'Oreal, it doesn't have a name on it or anything apart from the shade, which is "Silencio 001" here is a picture of what it looks like
 
 
And finally for gloss I used one of the new cream glosses by L'Oreal in the colour " girl on top, 001"
 
 
So that is it for this every day easy look, I hope you enjoyed and try this look out for yourself as it is suitable for any occasion!! And if you do try this look out you can tag me on instagram, tweet me or send me it on snapchat. I will list all of that information down below. Thanks so much for reading!!
 
XOXO


STALK ME:
 
SNAPCHAT - CHLOE_CALDER29
 
TWITTER - @CHLOECALDER_
 
INSTAGRAM - CHLOELOUISACALDER 


Wednesday 2 March 2016

Cute inexpensive mothers day gifts


Hi guys welcome back, so Mother's Day is this Sunday and if you're like me you have a very special lady to spoil. This blog is just going to be a couple gift ideas that are lovely and thoughtful and also very inexpensive. Every shop I purchased from was on the high street ( apart from amazon). I also will mention the prices of everything.


So the first thing I purchased is from Amazon, as you can see its just this cute keepsake heart. I love giving heartfelt gifts I imagine mostly because of how family orientated I am. I thought this gift was perfect because every time my mum looks at it she will be reminded of how much I appreciate her. This gift cost me £6.99.
The second thing I purchased was also from Amazon, I know its a little generic but my mum doesn't have a "special mug" so I thought why the hell not. Plus she does really enjoy a cup of tea. This cost me £3.50
 
 
The next thing I got was a shower cream from Lush and its called "Yuzu and Cocoa" and it smells incredible, it has grapefruit in it and I must admit I really do want to eat it. However on the bottle it says it smells like chocolate oranges but I get a sort of coconut scent? I don't know maybe its just me. Anyway this cost me £9.75.
 
The next thing I picked up from Lush was the Pearl Massage bar, I repurchased this for my mum because she absolutely adored it when I bought it for her the first time! Its basically just moisturiser in a bar instead of in a bottle, it has argon and rose oil in it and the little pink beads on top help boost circulation when you rub it on your skin. This was £6.50.
 
 
Now,my mum is absolutely obsessed with my Naked 3 Palette from Urban Decay, every time I'm at home and I've brought it with me she always asks me to do her eye make up. This eye shadow palate is from Revolution and is the Naked 3's double, all the shades are identical. And now my mum will have her own eye shadow so she wont steal all of mine. I purchased this from Superdrug and it cost me £4.00.
 
 
The final thing I picked up was a pair of PJ's because who doesn't like new jammies? You cant see it clearly in the picture but the top says "wake me at the weekend". This didn't come as  set I had to purchase these items separately, the top was £5 and the shorts were £2.50 and these are both from Primark.
 
So that is it for this blog, I hope you all enjoyed and I helped give you some idea's on what to get your lovely mums this mothers day. All I need to mention is that I have new codes for boohoo.com so for some ££ off the website just use the codes below :
 
 
XOXO
 
 
STALK ME:
 
INSTGRAM - CHLOELOUISACALDER
TWITTER - @CHLOECALDER_
SNAPCHAT - CHLOE_CALDER29   


Sunday 28 February 2016

Causal dark glam : brown lips

Hi guys welcome back , so today's post is going to be about this dark glam look. I've been really into brown lips lately I just feel like there is something so glamorous and mysterious about a dark lip. Now before we jump in i'm just going to mention that I don't really plan my blogs, I just sort of sit down in front of all of my make up and see what I feel like doing. For this particular blog I had no idea what I wanted to do with my eyes so I just had a play around with one of my palettes. So yeah that's all for my little ramble at the beginning and for how to achieve the look down below just keep reading!!


So the first thing I did was prime my entire face, including my eyelids and then I just applied some Vaseline onto my lips. Jumping into the eyeshadow part of the look I just used my Urban Decay Naked Basics Palette.
 So picking up the colour "Faint" which is just this nice brown colour that you are seeing, I just applied this colour onto the outer corners of my lid.
 For the remaining part of my eyelid I picked up the colour "Foxy" which is this bright shadow with some yellowish tones in it, just to make the darker shadow look more dramatic. And finally I just picked up a fluffy brush and blended the shadows just so there were no harsh lines.


For foundation I just used my L'Oreal true match in the colour ivory, and to blend it all out I used a damp beauty blender. For this look I decided to cream contour so I just my Iconic London cream contour kit, along with my B2 cream contour brush by Beau Belle, highlighter was obviously "Golden nights" by revolution.
 
 
After that I just filled in my brows and applied some mascara (just my usuals). I applied some false lashes just to give the look some extra drama, the lashes I used were the "7 lash" from MAC cosmetics. And finally for the brown lip I was going to use a liquid lip but instead I just used the Rimmel London exaggerate full colour lip liner in the colour 046 ultimate.


So that is it for this make up look I hope you enjoyed and you give it a try yourself, I don't believe I have anything else to say so until next time I will talk to you guys soon.
 
XOXO
 
STALK ME :
TWITTER - @CHLOECALDER_
SNAPCHAT - CHLOE_CALDER29
INSTAGRAM - CHLOELOUISACALDER 
 

Friday 19 February 2016

product showdown - L'Oreal skin perfection micellar water VS Garnier micellar water


Hi guys welcome back, so before we jump in I would just like to mention that I am now an affiliate for boohoo.com so for some ££ the website just use the codes down below :)


 So todays post is going to be a product showdown between two micellar waters that ive recently tried out, so im just going to be talking about my experience and how i feel about them .


So the first one I picked up was the L'Oreal skin perfection micellar cleansing water, I picked this up in my local supedrug because all i was hearing about was micellar water, I didn't really know much about it so I just picked up the first one I saw .  It is a good product, it did remove my make up and it did soften my skin, it basically does everything it says on the tin!! The only bad thing I could say about it is that it didn't last that long, I understand that the bottle isn't that big but I just felt like I didn't get enough.


The second product I picked up was the Garnier micellar water, after my L'Oreal one ran out I decided to go for another brand, just to see if there were any differences. Again this product does exactly what it says on the tin. The only differences I find in this product is that I feel like the Garnier water gives my face more of a deep clean, I have had to use a little extra moisturiser since using this product because of how much it deeply cleans my face, my skin has felt a little dryer but I have it totally under control. I also believe that this product lasts longer.
 
So that is it for todays post, I hope you all enjoyed. Please go out and try these products for yourselves and let me know what you think. I don't think I have anything else to say except happy Friday, have a great weekend, I love you guys and until next time i will talk to you guys soon.
 
XOXO
 
STALK ME:
 
TWITTER- @CHLOECALDER_
SNAPCHAT - CHLOE_CALDER29
INSTAGRAM - CHLOELOUISACALDER 


Thursday 11 February 2016

Soft and romantic valentines day look plus two lips


Hi guys welcome back so today im going to be showing you this nice soft valentines day look, and also his doesn't have to be just for valentines day, you can wear this look on a night out or just during the day when you're out and about or whatever!! so lets jump in...

ok so first things first you all know I primed my face (duh) using the rimmel London lasting finish primer, then I used my rimmel London match perfection concealer just to cover any redness and breakouts I had. Then moving onto my foundation you know I used my absolute favourite and that is the L'Oreal true match in the colour ivory because I am currently not self tanning, so I just applied the foundation with a flat foundation brush and then to make sure everything was perfect I just blended it out more using a damp beauty blender.

For contouring Im using the "Chisel Cheeks"  contour kit by BarryM and to carve out the contour i just used this beautiful rose gold contouring brush from revolution, im not going to go into great detail about the contour right now because I think i'll just do a whole blog post on how I contour my face, I am self taught like i dont do make up lessons or anything so i am always trying to improve on my techniques for you guys!! And for highlighter i used the revolution cosmetics highlighter in the shade "Golden Lights"

Eyebrows were Maybelline new York browsaitin eye pencil & filling powder in the shade medium brown

Moving onto the eyeshadow i used my naked three palette from urban decay ( couldn't take my own pictures of the palate because I've had it since it first came out so as you can imagine its not looking that cute). So firstly going into the pallet i just picked up the colour "Limit" and i applied that all over my lid, then i applied the colour "Burnout" onto my lower lid, then im taking the colour "Nooner" and applying that onto the outer corners or my crease and then also putting a little under my eye (if you're a regular reader you should know that ill get on you about blending your eyeshadow, but if you are new to my page then im going to tell you right now, BLEND BLEND BLEND the eyeshadow because us people on this page don't like harsh lines!!!)

For eyeliner and mascara you can use anyone you want but for me personally i just used the rimmel London glam eyes liquid liner and the miss sporty studio lash mascara. And the lashes were exclusively for superdrug double volume lashes - edition 40

And finally moving onto the lips... the first lip you can go for is the bright pink look, this is a liquid lipstick from revolution, its called "salvation liquid lacquer) and the colour is called "what i believe"
The second look you can go for is the soft warm brown lip, the first thing i did was apply a mac lip liner in the colour "whirl" and then i used a mac lipstick in the colour "velvet teddy"
(Top tip on how to make your lip colour stay n for longer.. put a bit of toilet paper on top of your lips and apply press powder to the paper using a powder brush, it makes your  lips matte and makes the colour stay on for longer, i know it sounds crazy but just trust me on this!!!)


So that is it for this valentines day look i hope you guys enjoyed and if you don't have a date or a valentine who cares? We don't do our make up for boys anyway!! Do whatever you want on valentines day.. get drunk, go on a romantic date, burn all your ex's stuff... whatever you feel like!!

XOXO

STALK ME:
TWITTER - @CHLOECALDER_
INSTAGRAM  - CHLOELOUISACALDER
SNAPCHAT - CHLOE_CALDER29

Sunday 24 January 2016

Vampy Chick /my go - to look lately & quick rant

Hello my favourite bunch welcome back to my page, so todays post is going to be this nice moody vampy chick look as it says in the title above, the reason this look has taken so long to be uploaded is because I actually filmed myself doing this look just so you guys could see exactly what I was doing instead of my going into great detail.. change is good right? So anyway this was my first time filming a video for you guys and I was really excited to branch out into something new however it ended up not working out. I filmed it successfully I edited it successfully ( well you know, as well as I could but it actually came out pretty good for a first timer) so yeah it was all edited and all ready for you all but for some reason I cant get it uploaded onto my computer its just refusing to work so there is no way that I am able to upload it here, I am very disappointed because I was excited to try something new.. I am thinking about starting a youtube channel because I did really enjoy filming the video.. So the youtube idea is just something I am considering right now, let me know what you guys think of that please, you can do this the usual way you guys reach out to me (snapchat, twitter). So yeah that's my little ramble rant over and out of my system and now we can jump straight in.


Face:
* Rimmel London lasting finish primer
* Rimmel London match perfection concealer -010 ivory- ive been breaking out recently :(
*L'Oreal true match foundation - "3.R/3.C beige rose" I had to apply this onto my neck as well because I have recently just scrubbed off my fake tan so this shade is a little dark for me. I blended this foundation out using my real techniques stippling brush
* Iconic London cream contour kit (not going to talk about this right now because i'm just trying it out)
          
Eyes:
*(brows) - Maybelline new York browsaitin eye pencil & filling powder in the shade medium brown
*(shadow) Urban Decays naked basics palette and the colour I used was "naked 2 " its just a smoky colour I've shown you guys it before. I also applied this shadow under my eyes.
* Rimmel London Glam Eyes liquid liner (to draw right across my lid)
* L'Oreal Paris super liner perfect slim ( to draw the wing)
* Miss sporty studio lash instant volume
* False Lashes - exclusively for superdrug double volume lashes - edition 40

Lips:
Mac-Media 


So that it is for this look, I felt like it was pretty basic so i didnt go into to much detail, again apologies for the late upload and for all the drama with the video. So yeah thats all thank you so much for reading ad until next time i will talk to you guys soon
 
XOXO
 
 
STALK ME:
 
INSTAGRAM - CHLOELOUISACALDER
 
SNAPCHAT - CHLOE_CALDER29
 
TWITTER - @CHLOECALDER_ 

Wednesday 6 January 2016

Quick blowdry ft. V05

So has anyone been given the gift/curse of having thick hair? If so you understand how frustrating it can be to have all this hair with a mind of its own. Now don't get me wrong I do like the fact I have thick hair, it means that I can do pretty much anything I want to it.. however I would definitely say the worst thing about having thick hair is when you have to blow dry it after you come out of the shower, its so annoying, its so frustrating and its just boring.

But now I have discovered two products that actually made blowdrying less time consuming and have been a real life saver.. especially on those days when you're running late.


So the picture you are seeing above is the two products that I am going to be talking about..

The first one is the V05 nourish my shine bedazzling oil heat protector, I did mention this in my previous blog so im not going to go on about it too much. But all it is, is a heat defence spray that adds shine and also conditions my hair whilst im blowdrying, all I do is I apply this from root to tip onto wet hair

The second product im going to be talking about is also from V05 and this is the smoothly does it heat protect serum and all this does is protect my hair from any heat damage and smoothes out any frizzyness it also adds a nice shine to my hair. I only apply this product onto the ends of my hair after I have sprayed the oil heat protector all over my hair.

I don't know what it is about this combination but both these products have saved me so much time, before using these products my hair would take around 30 minutes to blow dry and that would just make me bored and agitated but now using these two products have literally cut my blowdrying time in half, now my hair only takes around 15mnutes to dry at most. I know for some of you that is still quite a long time but for me anything uder 30 minutes is a blessing. Like I said I don't know how this combination works as they are not advertised to work together to make blowdying easier but for some reason they work amazing together. I cant express to you all enough how amazing these products are by all means go out and buy both of them and see the results for yourself!!

That is it for todays post, thank you so much for reading and to all my fellow thick hair girls be sure to try this combo out for yourself!!!

XOXO
 
 
STALK ME:
TWITTER - @CHLOECALDER_
INSTAGRAM- @CHLOELOUISACALDER
SNAPCHAT- CHLOE_CALDER29